Showing posts with label vegetarian. Show all posts

Wednesday, May 6, 2015

Cinnamon Honey Almond Spread

While I was at Whole Foods the other day, I was trying to find a decent almond butter that wouldn't cost me an arm and a leg. No such luck. So, I decided to make my own, which meant I got to control the flavor and ingredients while saving money. The cheapest almond butter I saw there was $13 for a jar. I made two jars for the price of a bag of almonds (just under $12) and some stuff I already had in my kitchen. In about half an hour, I had my own delicious almond spread that I can't wait to use in as many ways as possible!


INGREDIENTS

(this recipe is done per cup-to make enough to fill a medium mason jar, you're going to want to double the recipe below)
1 cup almonds
1 1/4 tsp cinnamon
pinch of salt
1-1 1/2 tsp honey
1/2 tsp vanilla
almond milk (this get drizzled in, so there's not an exact measurement)

EQUIPMENT

baking sheet
food processor
rubber tipped spatula
mason jar (or any jar with a lid)

DIRECTIONS

Start by preheating your oven to 350F and spreading the almonds out evenly on the baking sheet.
Bake for 3-5 minutes. You don't need the almonds to be super toasted, you're basically just "waking them up."
Place the almonds, cinnamon, salt, honey, and vanilla in your food processor and puree for about five minutes, stopping to scrape the sides with your spatula once or twice.
The mixture will be grainy at first, and almost powder-like. Don't worry, this is normal.
Scrape the sides of the food processor again and then turn it back on.
Slowly drizzle in the almond milk, about a tbs at a time, until the mixture is spreadable without being runny. Make sure to add the almond milk very slowly to avoid making the mixture too runny.
Store the spread in a mason jar and refrigerate in between uses.

What would you pair with almond butter besides cinnamon honey?

Until next time...
Stay Stellar,
Paige Elise

Thursday, March 19, 2015

Southwestern Frittata

Last night my boyfriend and I were looking through a cookbook I received from a friend for Christmas (Thanks Bernadette!) and came across a recipe for a tomato and asparagus frittata. Since our weather is still transitioning into spring here, our fruit and vegetable selection is really hit or miss right now, so we decided to use the instructions, but with whatever veggies we could find at the store that didn't look questionable. We decided to go with a Southwest theme and it was so good Bart is already on his second helping and asked if I could make it again soon.

I was only able to get one picture of it because we wanted to eat it before it got cold-and eggs can get cold pretty fast, but you can still see the veggies poking through and the yummy, bubbly cheese on top-and that's all that matters, right?


INGREDIENTS
*8 large eggs
*4 oz pepperjack cheese
*1 yellow onion
*2 green peppers
*4 tomatoes (I used Roma-if you use a larger tomato, use 2-3 instead)
*1 medium can of corn
*1 medium can of black beans
*salt, pepper, chili powder, cumin, cayenne, and paprika

INSTRUCTIONS

*Start by preheating your oven to 350F and cutting the veggies. You'll want the onions to be smaller and the peppers and tomatoes to be medium sized.
*Once the veggies are cut, melt 2-3 tbs of butter in a cast iron skillet over medium heat and add the onions and spices in. I didn't measure the spices at all, so you'll just want to add them to taste.
*While the onions are caramelizing, rinse the corn and black beans so they don't add unnecessary starch to the frittata.
*When the onions are about halfway caramelized, add the green peppers in. Sautee for about five minutes and shred the cheese while you stir occasionally.
*Crack the eggs into a large bowl with 1/4 cup water and half of the shredded cheese. Beat until fluffy.
*Add the corn, black beans, and tomatoes into the skillet and cook for about a minute before pouring the eggs over the top. Make sure the eggs evenly coat the veggies. It's ok if a little bit pokes out of the top, but you want them to at least be mostly covered.
*Cover the skillet and cook for ten minutes or until the eggs are fluffy and cooked all the way through.
*Top with the remaining cheese and bake in the oven for 1-2 minutes or until the cheese is bubbly.
*Serve immediately with avocado, sour cream, and/or salsa.

This was honestly one of the easiest dishes I've made in awhile and definitely the tastiest dinner we've had in weeks.

Let me know if you make this and if you used any substitutions or add ons!

Until next time...

Stay Stellar,
Paige Elise

Sunday, November 16, 2014

Pumpkin Potato Soup

This pumpkin potato soup is another one of those dishes where I've made so many times that I've lost count. I've been making it for almost two years now, so I've tried plenty of substitutions and fixins. This recipe is for the basic soup, but I have some substitution and fixins ideas (and some to avoid) at the bottom.

This soup is incredibly easy to make. The hardest part is trying not to cry while chopping the onion up. It takes about 30-45 minutes to make from start to finish and will make 6-10 bowls depending on how hungry everyone is.


(as always, click on the pictures to view them larger)


INGREDIENTS
1/2-1 yellow onion
1 small spoonful of butter
6 cups chicken broth or stock
1 15 oz can pumpkin puree (make sure you get plain puree and not pie filling)
3 large russet potatoes
1/2 cup heavy cream
salt, pepper, and nutmeg to taste

TOOLS
2 pots (one for the soup and one to boil potatoes in)
1 cutting board
1 knife
1 colander or slotted spoon
1 wooden or metal spoon for stirring


DIRECTIONS

Start by filling the potato pot about halfway with salted water and setting it on high to boil.

While waiting for the water to boil, finely dice the onion and cut the potatoes into bite sized pieces. I use a whole onion because they're one of my favorite foods, but you can opt for half an onion if you'd like.

Turn your soup pot on to a medium heat and completely melt the butter. Add a pinch of salt and pepper and stir in completely before adding the onions in. Take your time to make sure the onions are completely caramelized. Trust me, it's worth it to take your time building the layers of flavor in this soup.

Once the water in the other pot is boiling, add the potatoes in. I keep the skins on my potatoes, but you can peel them if you'd like. You need to cook them separately or else your soup will be too starchy.

After the onions are completely caramelized, add the chicken broth, pumpkin puree, and salt, pepper, and nutmeg to taste. Bring the soup to a boil while stirring to make the the pumpkin puree is completely incorporated into the broth and then turn the heat down to a simmer.

When the potatoes are done cooking, transfer them to the soup using a colander or slotted spoon. Add your heavy cream, stir to make sure everything is combined, and taste to see if you need to add any more spices.

Put a lid on your pot and let it simmer for 10-15 minutes before serving.


SUBSTITUTIONS AND FIXIN IDEAS

Since I've made this soup so many times, I've tried experimenting with it and have a few ideas for what you could add (and what you shouldn't) to pump it up a little more.

So far I've discovered that trying to substitute the heavy cream for milk or greek yogurt didn't end very well. The milk just wasn't creamy enough and the greek yogurt made it so sour it was inedible.

I also tried using olive oil and vegetable oil instead of butter and the soup turned out all right, but the butter does taste a lot better.

I only use Libby's brand of pumpkin puree because I've tried some different brands and they all taste "off."

As for the onion, white works fine, but purple is too overpowering.

You can substitute vegetable broth/stock for chicken broth/stock to make it vegetarian and it tastes just as good.

For fixins, I've added different cheeses on top as a garnish and they've all tasted good. My personal favorite was some grated parmesan.

You can also add in some meat to make it even heartier. My mom made carnitas for dinner last night, so crisped some up in a pan and topped the soup off with it today. My boyfriend and I were both fans of this fixin.

I hope you all enjoyed this post! If you end up making this soup, let me know how it turned out and any experiences you have with substitutions or fixins of your own and until next time...

Stay Stellar,
Paige Elise

Monday, September 22, 2014

Garlic Pinto Beans

When I was in 7th grade my dad married my now-stepmom who is half Mexican and half Native American. I remember being really excited about the possibility of her teaching me authentic recipes from both sides of her family only to find out that the only thing she could really cook was garlic pinto beans. But if you're only going to be good at cooking one thing, you're probably really good at it, right? Right.


When I was at their house one time, she was making the beans for dinner (they're so good that we would just eat them with tortillas and call it a meal) and said she would teach me how. Let me start by saying this recipe is so easy that a monkey could do it. Once you do it once, it's stuck in your head forever, because it's literally THAT easy, which makes the result even more surprising. Let's do this thing!


All you need for this recipe is dry Pinto beans, fresh garlic, salt, and pepper. That's literally it. You can add peppers if you want, but they're just as amazing without.


The first thing you're going to do is soak the beans overnight. Get a bowl, pour the bag of beans in, and cover with water. Depending on how wide the bowl is, you're going to want at least an inch of after over the beans, but I usually just fill the bowl up most of the way to be safe. The beans will soak up some of the water and expand overnight, and if you don't add enough water they'll soak up different amounts and cook unevenly, so when in doubt-add more water.

You can either use a crockpot or a large pot to cook the beans in the next day. I prefer using a crockpot even though my stepmom uses a stove top pot because I don't have to worry about checking the beans as often. You're going to drain and rinse the beans and then place them in your cooking vessel followed by about twice as much water as beans. I was taught to just eyeball it and that once again more water is better than less, so that's what I do.

You're then going to peel and smash anywhere from a half a bulb to a full bulb of garlic depending on how much you like garlic and how big your bag of beans is. I almost always use the whole bulb no matter what, because garlic is one of my favorite kitchen smells and tastes.

Pop the garlic in with the beans and add salt and pepper to taste. I actually normally use garlic salt when making these because I'm a garlic freak, but you can use whichever salt you like best.

And that's really it! If you're using a crockpot, the beans should take about 6-8 hours on low and around 4 hours on high, but if you're using a stove top pot they should only take 2-3 hours. Make sure to keep the temperature on low if you're making them on the stove.

When the beans are done, they should be soft to the bite and have created their own sort of soup, which is why I like adding extra water. Everyone I know loves the soupy water with the beans, but you can use a slotted spoon to serve them if you just want regular beans. I chose to leave the garlic bulbs in because I like the way the bulbs taste when they're cooked, but you can take them out as well.

Like I said, this recipe is so easy a monkey could do it. I really only made this post because every time I make these beans for people they ask for the recipe, so I figured I'd share it with all of you too!


Until next time...


Stay Stellar,

Paige Elise

Friday, September 5, 2014

Carrot Cupcakes with Cinnamon Cream Cheese Frosting

I was one of those weird kids that LOVED carrot cake growing up. But I always picked the raisins out (seriously, who decided that putting raisins in baked goods was a good idea?). It wasn't until my mom's friend graduated from college and had a carrot cake with pecans in it that I had ever thought of the idea, which was apparently just as popular as raisins. My mom can't stand nuts aside from almonds, and definitely doesn't like them in her baked goods, so I came up with a basic carrot cake cupcake that can be kept as is or have raisins, nuts, or whatever else you want added to them. Bear in mind that this recipe only makes 12 cupcakes, so if you need more it's really easy to double, triple, etc.

As always, click on the pictures to view them larger!


HERE'S WHAT YOU'LL NEED


*1 large egg (room temperature)

*1 cup golden brown/medium strength brown sugar (packed)

*1/2 cup of vegetable oil

*3 cups of shredded carrots

*1 1/2 cups all purpose flour

*1 tbsp ground cinnamon

*1/2 tsp baking powder

*1/4 tsp baking soda

(for the frosting-not pictured)

*4oz plain cream cheese (room temperature)

*1/2 stick butter (room temperature)

*1 tbsp ground cinnamon

*1/2 lb powdered sugar

*milk


LET'S DO THIS!

First off, preheat the oven to 350 degrees Farenheit and line a cupcake pan with liners.

You're going to whisk the flour, cinnamon, baking powder, and baking soda in a bowl.


In another bowl (or a mixer if you have one) beat the egg, oil, and brown sugar together. It should look almost like a gooey caramel.


Once those ingredients are mixed together well, add the carrots in.


After the carrots are incorporated, slowly mix in the dry ingredients. Scrape the sides at this point to make sure all of the ingredients are evenly mixed in.


Next, fill the cupcake liners up evenly.


Bake until you can pull a toothpick/knife out without anything coming off it-it should only take about 15-20 minutes.


When the cupcakes are cool, make the frosting by beating the cream cheese, butter, cinnamon, and a small splash of milk (about 2 tbsps) together. Slowly add the powdered sugar until you reach your desired consistency. If you add too much powdered sugar, simply add milk about a tbsp at a time. I knew I wanted the frosting on these to look more rustic, so I added less powdered sugar than I would if I were going to pipe the frosting on.

As soon as these came out of the oven my mom was asking every thirty seconds when she could eat one. The kitchen smelled like a Yankee Candle store in the middle of October, so I don't blame her.


These babies are so moist that I seriously don't understand how they hold together when the cupcake wrappers are taken off.


They got a thumbs up from everyone in the house, so hopefully you'll like them too if you make them!

Until next time...


Stay Stellar,

Paige Elise

Sunday, June 8, 2014

Green & Yellow Salsa

Having grown up in San Diego, I've had my fair share of salsas. This is one I came up with when thinking of ingredients that I like in salsa. I wanted to include avocado, green pepper, and corn, and decided to go with an all green and yellow theme. This recipe can easily be altered if you want to substitute any ingredients (ie: a purple onion or red pepper instead). What's great about salsas is that almost anything goes. Let's get started!

(as always, click on the images if you'd like to see them larger)


Here's all of the ingredients that you'll need:


*1 green pepper
*2 small avocados(or 1 large)
*fresh cilantro
*1/2 of a yellow onion
*1 jalapeno
1 lime
1 can of corn

*not pictured: salt, pepper, a knife, a bowl, a cutting board, and gloves for cutting the jalapeno (recommended)


To start, drain the corn and pour it into the bowl


Dice the green pepper and put that into the bowl as well.


Dice the jalapeno into tiny pieces (they pack more punch than the pepper, and you don't want it to overwhelm the rest of the salsa).


Dice the onion into pieces about the same size as the pepper.


Cut the avocado into pieces about twice as large as the pepper and onion.


Finely chop about a handful of the cilantro.


Add the juice of the entire lime (I recommend rolling the lime on the cutting board before slicing it and sticking a fork in the center while squeezing-doing both of these things will help you get more juice out) and salt and pepper to taste.


Mix it gently (you don't want the avocados to turn into mush), cover, and chill for a few hours before serving. This last step gives the salsa time to absorb the flavors of the salt, pepper, and lime better.


This salsa goes great on top of tacos (or even just chicken), with tortilla chips, or even just as a side dish!


I hope you've all enjoyed this recipe, and until next time...


Stay Stellar,
Paige Elise

Saturday, December 28, 2013

Banana Blueberry Power Smoothie Packs

I've never been someone who could eat a huge breakfast without feeling sluggish all day, but just a piece of toast was getting boring day after day and didn't really give me much energy. I've always been a big fan of anything that comes in blended form (frappes, slushies, milkshakes, smoothies, etc.) but I don't want to wake up early everyday to put stuff together for one. So I decided to make smoothie packs with some of my favorite ingredients that I can just pop into the blender in the morning before I leave for work.
I work at a daycare, so I need all of the healthy stuff you can think of to get me through the day (don't get me wrong, I love my job, it just requires a lot of energy that a piece of toast wasn't giving me), which is why I decided to put together this combination of powerful foods to get me ready to take the day on!

First off, here's what you need for the smoothie packs:


*Small freezer bags (must be freezer bags to avoid frost)
*Sharpie
*Cutting board
*Knife
*Spoon
*Bananas (help battle depression, maintain blood sugar, give you energy, full of antioxidants, the list goes on...)
*Blueberries (proven to have more antioxidants than any other fruit or vegetable, promote brain/sight/heart/bone health, and helps get rid of belly fat) *Raw Almonds (aid in weight loss/maintaining your weight, help with brain function, and lower your cholesterol)
*Greek Yogurt-I have two different flavors and regular yogurt for the fifth smoothie pack shown for people who don't like Greek Yogurt (full of protein and calcium, has probiotics which help with digestion and improve your immune system, and keeps you feeling full longer)

After you've gathered all of your ingredients, label your freezer bags so you know when you made them and what's in it (you can tell for the most past just from looking, aside from the yogurt flavor).


Next, slice each banana and place one in each bag.


After you've done that, place two handfuls of blueberries in each bag.


Then, add a handful of the raw almonds to each bag.


Lastly, add half a container of Greek Yogurt to each bag (2-3 spoonfuls if you're taking it from a large container), flatten it to get as much air out as possible, then tightly seal it.


Your smoothie packs are now ready to freeze! You won't need to add ice, but you might want to add a splash of milk if it's too thick once it's blended. I suggest storing them flat so they take up less space in the freezer. Have fun making/drinking these and coming up with your own variations!

Stay Stellar,
Paige Elise

Tuesday, October 8, 2013

Super Simple & Versatile Spaghetti Sauce

In the break room at my work a few months ago I was having a conversation with another woman who loved to cook about our favorite things to make. The conversation then turned into foods that are much better when made from scratch. She said spaghetti sauce was her favorite considering how easy it was to make and told me the basics to how she prepares hers. So thank you Kay for giving me the basics to spaghetti sauce making and inspiring me to come up with my own recipe!

What I love about spaghetti sauce is how versatile this is. When you make this, I encourage you to play around with different spices or add ins (like meat). I'll try to explain it the best I can through text and pictures, but let me know if you have any questions!


Ingredients:
*Two large cans of crushed tomatoes-I've used diced tomatoes before, but prefer the smooth texture of the crushed tomatoes. You can definitely use diced if you want it to be chunkier though!
*Two small cans of tomato sauce
*A head of garlic-I only used a couple pieces, which was more than enough.
*Red Wine-I use Livingston Chianti, which is only about $8. My boyfriend works in the Wine & Spirits department at our local grocery store and everyone there said it's the best to cook with at a decent price.
*Olive Oil-forgot to include it in the picture, but it's important if you're using fresh garlic!


Spices/Herbs:
*Kosher salt-if you don't have it, just use regular salt. I do prefer kosher for cooking though.
*Pepper
*Basil
*Thyme
*Parsley
*Morton's Nature's Seasonings-if you don't have this, I recommend getting it. It's only $2-3 and it's AWESOME.
*Trader Joe's 21 Seasoning Salute-not necessary if you don't have it, I just like adding it to my sauce since I always have it on hand.


Tools:
*A big soup pot-my roommate, Kelley, is nice enough to always let me use hers since I don't have my own yet.
*A cutting board and large knife (to crush the garlic on/with)
*A wooden spoon
*A can opener


Step one: crush the garlic by placing as many pieces as you want on your cutting board, placing the large knife flat on top of each piece, and smacking it (carefully) with your hand to make it burst open.
Step two heat a tiny bit of the olive oil in the pan on medium heat and add the crushed garlic chunks. Cook until the garlic starts to slightly brown and you can smell it. Make sure to move it around so it doesn't burn.


Step three: Add the wine! If you don't like wine or want the sauce to be thicker, only add a little bit of wine. If you like the taste of wine or want it to be thinner, add more wine. I just add enough to make the large pot about an eighth of an inch full. Let the wine and garlic cook on low heat for about 15-30 minutes.


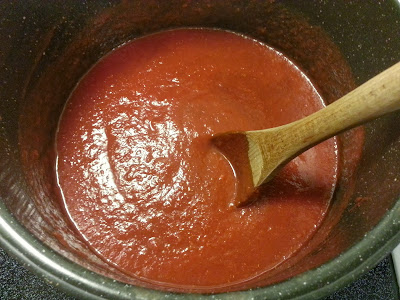
Step four: add both cans of crushed tomatoes and tomato sauce to the pot and mix it all together.


Step five: add the spices. I always add a basically equal amount of everything and then taste the sauce every hour to see if it needs more of anything. If you don't like one of the spices I used or want to add something I didn't picture, go for it! This recipe is super versatile.
Step six: keep the sauce cooking on low and mix every half hour or so. Taste it here and there to see if you want to add anything to it. I recommend cooking it for at least six hours to allow the flavors to really meld together nicely.
*Sidenote: this is the part where you'd add any meat. I did last time I made this recipe, but I wanted to keep it simple this time for the sake of the blog.


Step seven: serve or store in freezer bags (make sure to let it cool if you plan on putting it in freezer bags first).

*This recipe makes about 6-10 servings depending on serving size by the way

Let me know if you found this helpful and how your sauce turned out if you make it!
Stay Stellar,
Paige Elise